Cyso's new OpenStack platform (called Fuga.io) is currently undergoing rigorous beta testing by an ever-increasing amount of users. To facilitate them, we’re constantly adding images and operating systems to our library in Horizon. We’ve just released a new beta image for FreeBSD 10.1-RELEASE. To give you an understanding in what went into creating this image, we’ll provide you with a small guide and some backstory here.
Cloud images
Most of the cloud images consist of a few parts, which are generally the same between images:
- A base installation of an Unix flavor, usually Linux
cloud-initfor post-deployment customization- A SSH daemon for accessing the instance after deployment
For a lot of Linux flavors there are ready made cloud images available, for instance at Canonical and Fedora. OpenStack itself maintains a list of ready made images in their documentation. Unfortunately, BSD based images seem to be a bit rare, even though OpenStack provides a guide to create them. Time to change that.
Creating a FreeBSD image
The creation of a FreeBSD image, or any cloud image for that matter, can be split into a few parts.
- Creation of a base disk image, usually QCOW2 format
- Installing a minimal installation into the disk image
- Customizing the installation and installing
cloud-initLet’s walk through these steps to provide some insight into this process and a concrete example you can use and adjust to create other cloud images.
Creating a QCOW2 image
A base disk image at this step is just an empty container that specifies how large it may grow. The resulting image will be smaller than that, because of the way QCOW2 stores its data. Use the qemu-img tool to create the image. For the purpose of creating a FreeBSD image, 2GB is a good size.
qemu-img create -f qcow2 freebsd.qcow2 2G
Installing a minimal system
This step entirely depends on the OS and/or distribution used. In our case we will be using an ISO file, and we will be using the normal FreeBSD installer to install a minimal system. This method should be usable for most other OS’s, but there may be more efficient methods available.
We’ll be using a KVM virtual machine and a downloaded FreeBSD 10.1-RELEASE 64bit ISO. To start the VM using the ISO and disk image we created earlier, use this command:
kvm -smp 1 -m 256 -cdrom /home/chaos/Downloads/FreeBSD-10.1-RELEASE-amd64-disc1.iso -drive if=virtio,file=freebsd.qcow2 -net nic,model=virtio -net user
This will start a VM with 1 vCPU, 256MB of memory, the ISO file mounted as CDROM, the disk image we created earlier as disk, and a network card. Note that in the drive and network card options we specify we want to use the virtio hardware. This is important, as the environment we will be running the eventual image in will be using the same hardware. Depending on your situation, you may need to specify different hardware here. A lot of OpenStack setups use KVM and virtio hardware, so these should be safe choices to try.
The FreeBSD installer itself is pretty straightforward. The options we will need to specify are below:
- Select
INSTALLmode - Select the default keymap
- Specify a hostname:
freebsd10-cloudinit - Uncheck all packages. We want to create an image as small as possible
- Specify the partitioning to use:
- Create a new GPT partition table
- Create a new partition with type
freebsd-boot, a size of 64K and no mount point and label - Create a new partition with type
freebsd-ufs, don’t change the suggested size, enter/as mount point and specify no label - Hit finish and accept
At this point the base system is being installed. Note that the hostname and disk size we specified earlier will be overridden by cloud-init on the first boot on OpenStack. Time to configure the base system:
- Enter a root password. We will be removing it later, so it doesn’t matter what you choose here.
- Select the vtnet0 network card
- Select “YES” on the IPv4 question and enable DHCP
- Select “NO” on the IPv6 question
- Accept the default DNS settings
- Set the CMOS clock to UTC
- Select a timezone
- Select the
sshdandntpdservices to enable them on boot - Create no new users
We don’t need to specify any new users. On the first boot on OpenStack, cloud-init will create a new freebsd user. We will be giving this user sudo rights, so we can leave SSH root login off and disable the root password later.
Customizing the base installation
At this point you want to select “Exit” and select that you want to open a console for the final customizations.
- Modify the boot options by running these commands:
echo 'console="comconsole,vidconsole"' >> /boot/loader.conf echo 'autoboot_delay="1"' >> /boot/loader.conf - Enable
pkgngand install thelibnssroot CA bundle:pkg install ca_root_nss - Download the
bsd-cloudinit-installerand run it:fetch --ca-cert=/usr/local/share/certs/ca-root-nss.crt https://raw.github.com/pellaeon/bsd-cloudinit-installer/master/installer.sh sh installer.sh - Install
sudoand add a sudoers rule for the freebsd user:pkg install sudo echo 'freebsd ALL=(ALL) NOPASSWD: ALL' > /usr/local/etc/sudoers.d/10-cloudinit - Disable the root password by using
vipwand replacing the hash for the root user by “*” (without quotes). - Clear the history:
set history = 0 - Shutdown:
shutdown -p now
At this point we're done. The QCOW2 image now contains a minimal installation of FreeBSD, customized to use cloud-init on first boot to allow customization from OpenStack.
So what now?
The process described above is how the FreeBSD 10.1-RELEASE image was created for
Fuga.io. The process itself will allow you to retrace our steps and create your own custom image. For instance, you may want to install the ports tree during installation so you don't have to do this after deploying the machine. Or you might not want to use cloud-init but another system, or make sure that a configuration management tool like Chef or Puppet is pre-installed in the image. You can customize whatever you want. The process itself should also be similar for Linux flavors, just make sure you install the Linux version of cloud-init instead of the BSD version we used.
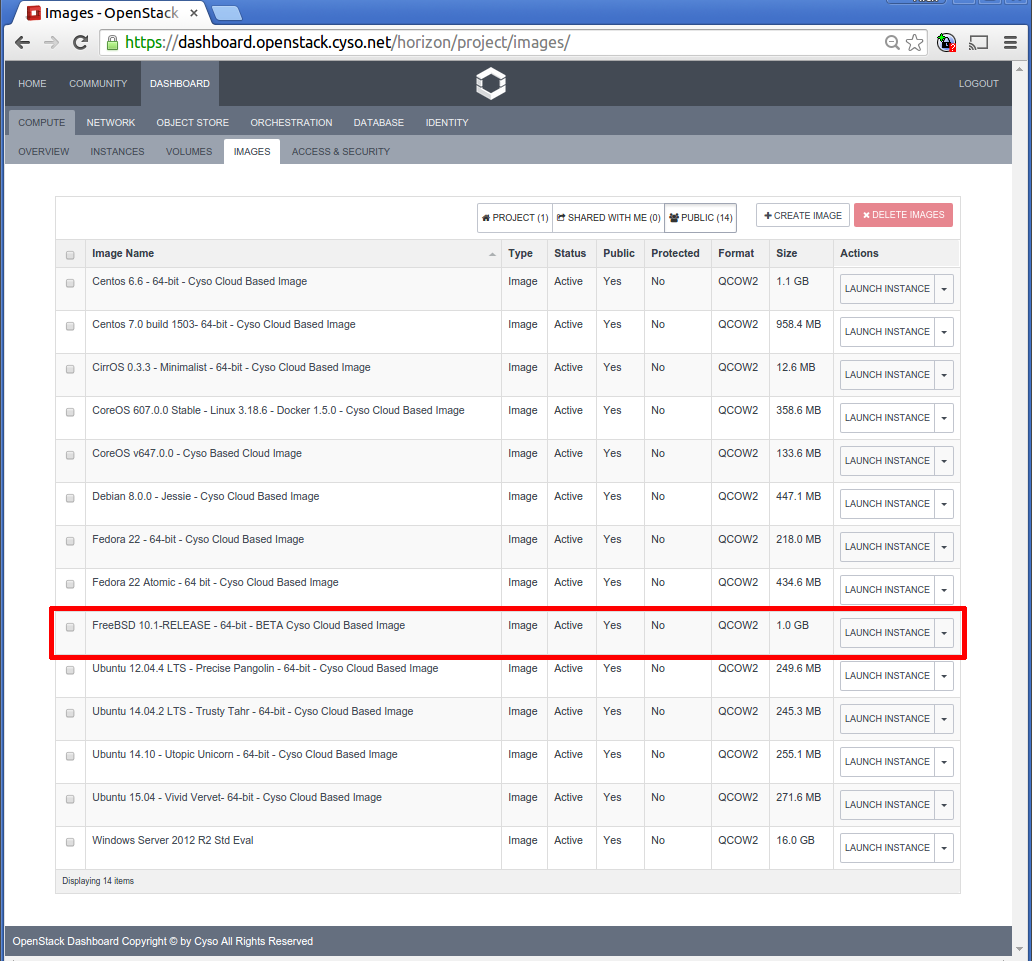
You can deploy the new FreeBSD image right now on Fuga.io. Do note that, because we have just released this image, there may be some problems or issues. For this reason, the image will be in beta until we have had some time to do further tests and gather feedback from our users. Be sure to leave any questions on the Fuga Community website.